Hi! Elizabeth here!
One of the things Joanna, Julia, and I decided to do when starting this blog is to institute a weekly DIY challenge. What that means is that once a week one member of the blog will be challenged to do some creative-making-task that is given to her by either the other two bloggers, our friends and community, or the blogosphere. These challenges could be anything, from ridiculous and impossible to totally useful. The restrictions are as follows:
* They cannot cost us anything outside of ordinary crafting supplies that we already should own.
* They need to be at least minimally eco-conscious.
* They cannot be just a copy or a link to someone else's tutorial-it has to be our own!
So for our first challenge, Julia and Joanna challenged me to do a t-shirt remake that is "not lame." The not lame part has been wigging me out, honestly...I mean, being "cool" has not really ever been my MO. I saddled up my courage however and am quite pleased with the results of my experiment!
T-Shirt Upcycle- "Halfsies"
Difficulty Level: Intermediate to Hard
Skills Needed: Straight sewing on a sewing machine, topstitching (just google it), double hemming, zig zag or serging, and your basic scissor wielding skills
Supplies Needed:
1. Look at your shirt. Does it fit you right? Is it worn out and nubby or still have some good use left on it?
Skills Needed: Straight sewing on a sewing machine, topstitching (just google it), double hemming, zig zag or serging, and your basic scissor wielding skills
Supplies Needed:
- A solid colored t-shirt
- Fabric that feels like similar fabric and contrasts nicely with your t-shirt (you could use a second t-shirt)
- A sewing machine
- Matching thread
- Seam ripper
- Scissors
- Chalk or tailors chalk
1. Look at your shirt. Does it fit you right? Is it worn out and nubby or still have some good use left on it?

2. Mine looked fine (it's actually my husband's) other than it being kinda big. This actually ends up working great because it leaves a lot of room for error in case you make a mistake, cut a little too much off, etc.
Go ahead and lay your contrasting fabric on top to see if you like the colors together. The top half of the original shirt will show, but just below the color the contrasting fabric will start!
Go ahead and lay your contrasting fabric on top to see if you like the colors together. The top half of the original shirt will show, but just below the color the contrasting fabric will start!
8. Flip the shirt back over and unpin it.
9. Cut on your first chalk line on the shirt, cutting the lower half of the shirt off.
10. Now pin right sides together one layer of contrasting fabric with one side of the shirt and do the same thing to the other layer.
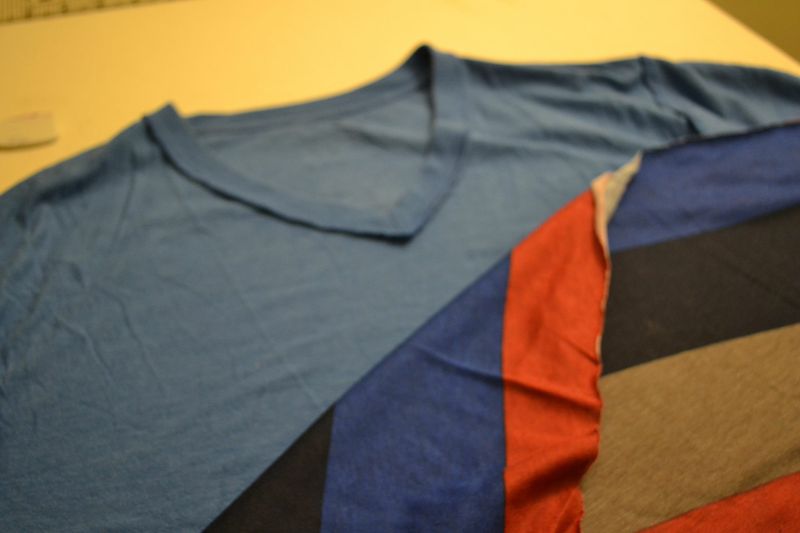
11. Sew where you pinned, being careful to sew straight and, if the fabric is stretchy, to pull on it a little to help your stitches not pop when the fabric is put under pressure later.
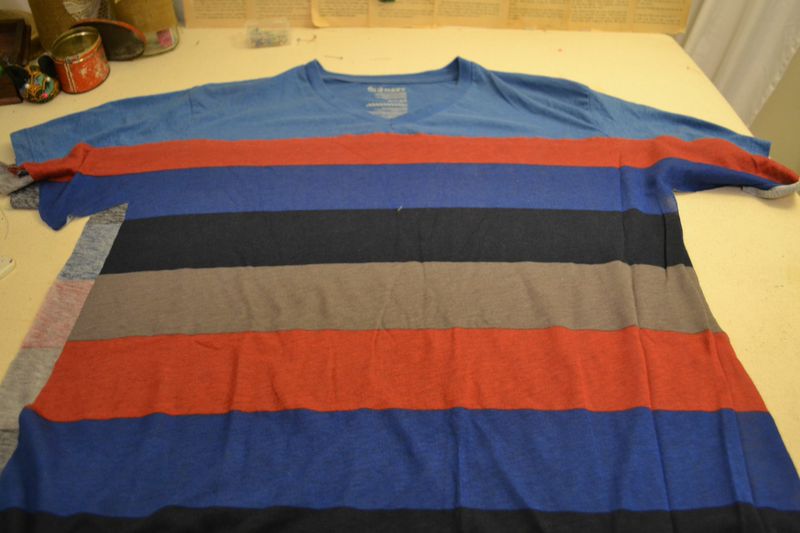
12. Now topstitch the seams you just sewed with a big stitch, not stretching the fabric quite as much. At this point it will look like this.
9. Cut on your first chalk line on the shirt, cutting the lower half of the shirt off.
10. Now pin right sides together one layer of contrasting fabric with one side of the shirt and do the same thing to the other layer.
11. Sew where you pinned, being careful to sew straight and, if the fabric is stretchy, to pull on it a little to help your stitches not pop when the fabric is put under pressure later.
12. Now topstitch the seams you just sewed with a big stitch, not stretching the fabric quite as much. At this point it will look like this.
3. I like how they look, so I'm going to keep going. First, with your shirt laid flat, draw a point with your chalk one inch below the bottom of your v-neck shirt. If it is a shirt with a much higher collar, make the mark about 6'' below your shoulder seam. Next, trace a line straight across the chest part of the shirt and straight across the sleeves when the sleeves are stretched out and laying flat.
4. Now, with your contrasting fabric folded in half so you will be cutting out two pieces of fabric, lay the fabric on top of your t-shirt so that the top of the contrasting fabric is touching your chalk line all the way across and so that the contrast fabric hangs over the sides and bottom of the shirt. It doesn't matter whether the contrasting fabric and t-shirt are inside out or right-side out at this point.
4. Now stick some pins through all the fabric to hold the contrasting and the solid t-shirt fabric together and in place on the chalk line.
5. Great! Now flip the whole thing over so the contrasting fabric is on the bottom laying flat under the shirt and the shirt is laying on top.
6. Trace around the edges of the shirt with your chalk onto the contrasting fabric, starting where you began one end of the chalk line, going down the sleeve, under the armpit, down the side of the shirt, across the bottom, up the other side of the shirt, up that arm pit, up the sleeve to the other point.
7. Okay cool, now cut on the line you drew, from the point on your sleeve down and around the and back up to the sleeve. If your shirt is too big, this is a good time to make the new one smaller. I laid a shirt that fits me on top of everything so I could see how much I needed to cut off.
13. Great! Now turn the shirt right sides together, pin, and sew the side seams through the bottom of the sleeves. If you have a serger or zig zag stitch you can go ahead and finish those seams.
14. Hem the sleeves using a wide double hem.
15. Hem the bottom of the shirt using a wide double hem.
16. Trim threads and iron, especially your hems!
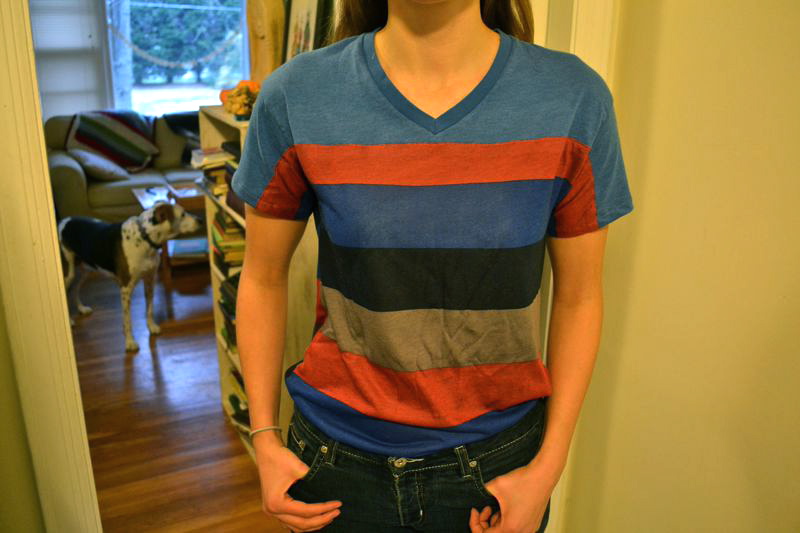
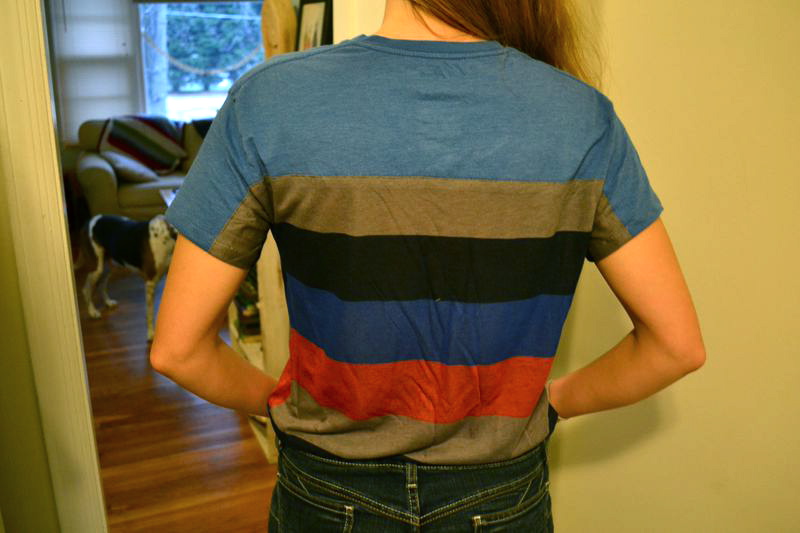
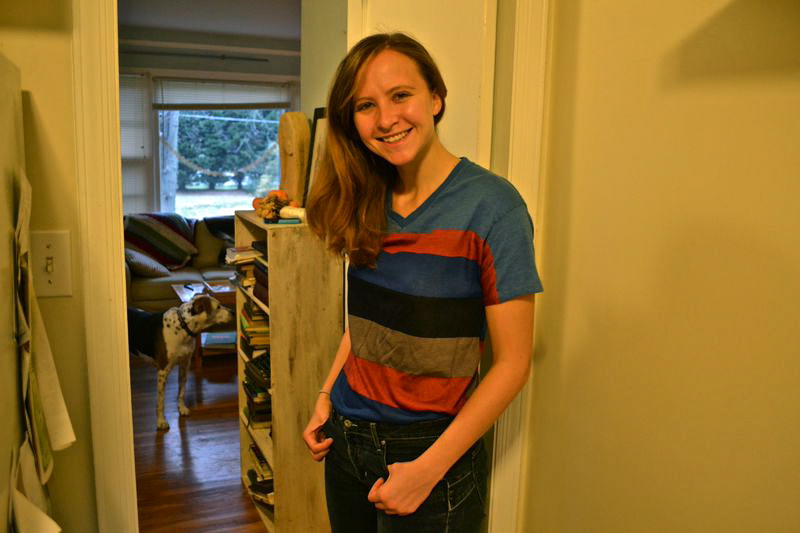
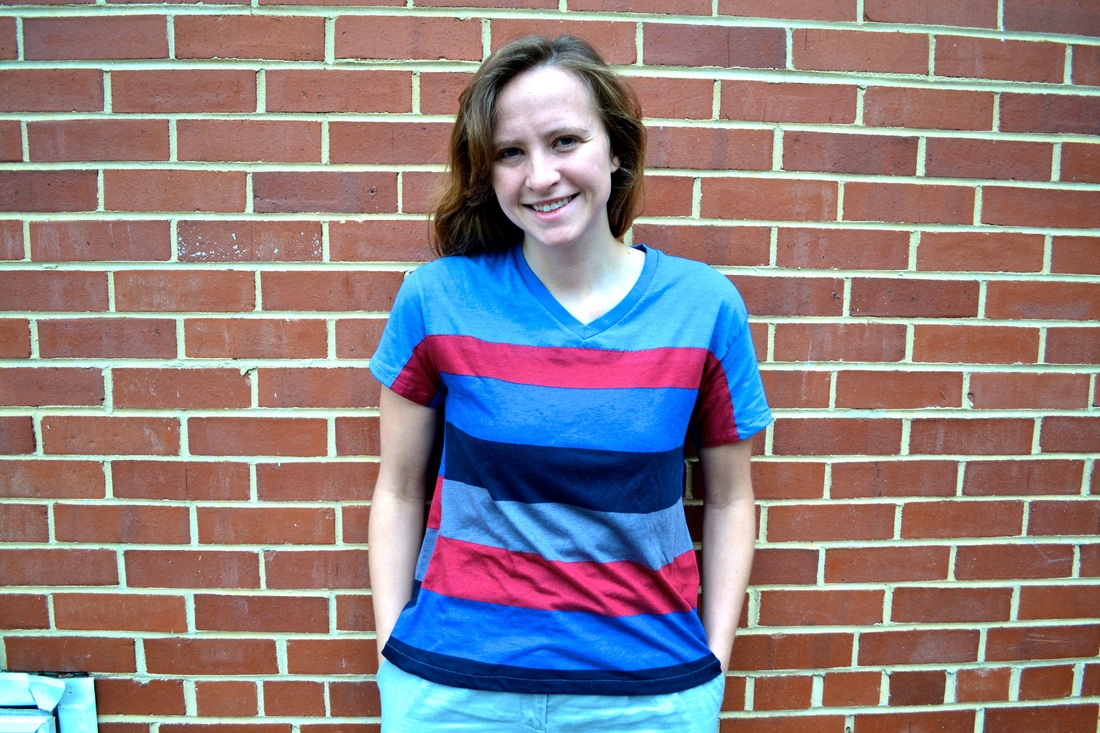
17. Ta Da!
14. Hem the sleeves using a wide double hem.
15. Hem the bottom of the shirt using a wide double hem.
16. Trim threads and iron, especially your hems!
17. Ta Da!
 |  |
 RSS Feed